Why the Blog......

9 years now into the blog, and lots and lots posts on the SWOFFING (Salt Water Fly FishING) in and around Darwin - maps, flies, outings and musings

Hope your enjoying it!

Saturday, December 31, 2016

Parts of Crab - phase two

So while parts are drying - here's an update
Yesterday arvo, I put together 10 sets of crab claws


I then tested my ideas for the base of the crab

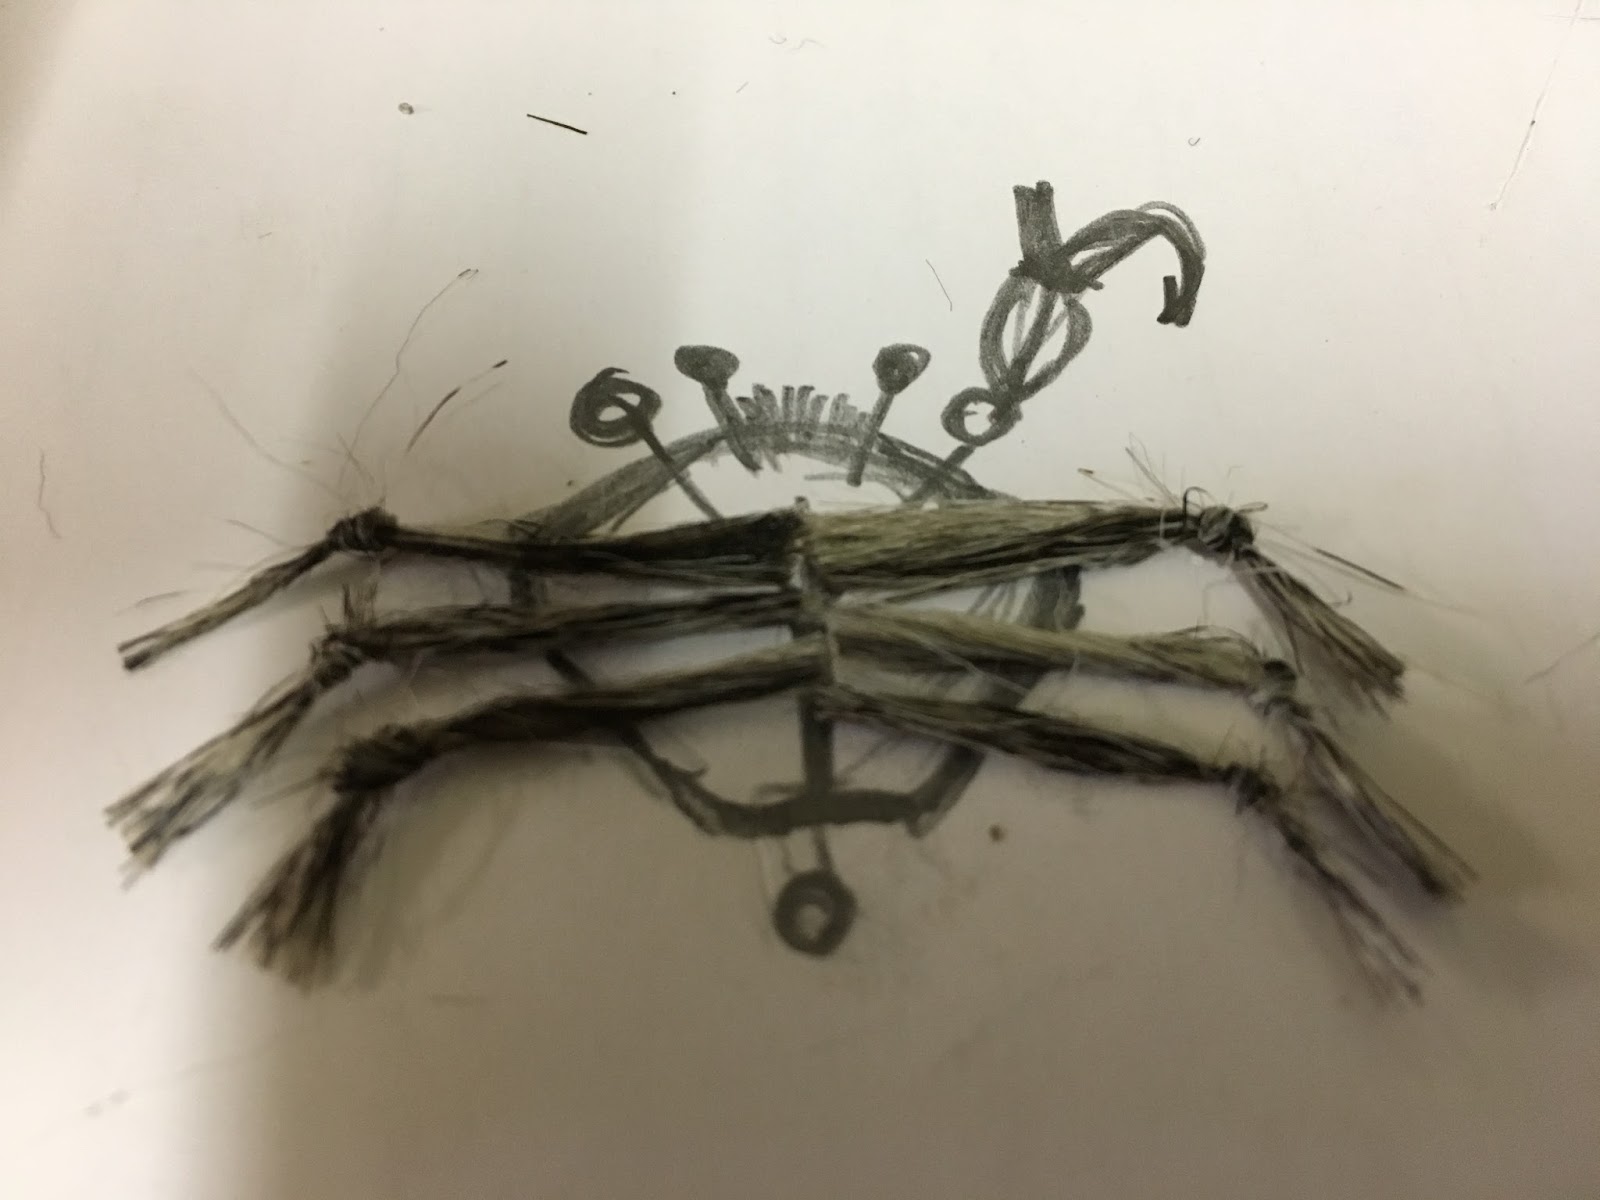
The crab fly base to which every thing else gets glued
A bent long shank hook each side - add eyes (glass bead on mono) and deer hair fibres for mouth
was thinking of a glass rattle in there but can't find them in my tying material boxes
Sadly on testing to see if the claws move freely - I find the space of hook eye of the claw hook is too small for the metal that makes up the hook eye of the crab base structure - bugger!

Solution --- small split ring? (thanks Sam for the idea)
Don't know if it will work yet as need to get a very small split ring
Its a great advantage posing a question online and getting multiple answers to help

Back to the making the legs..........
Originally I was thinking of buying pre made store bought latex legs for the crabs
But might as well buy the entire fly or a lure and fish the dark side than do that!
If I was tying commercially - (20 years ago I did! - so silly!) - I would buy the preformed legs as much quicker to tie with and will do the job - but for me, for personal use - make your own.
Plus the monsoon is bucketing down outside and seeing when you can't go fishing -- let's tie flies for when it stops raining

After the rubber legs option was ruled out - I was focusing on the polarfibre based legs which I have written about in my last blog

But I was needing a few items from the shops. First an El Cheapo chemist for some coloured nail polish (hot pink and fluoro orange for the tip of the crab claws), then Bunnings for some black spray paint for the carapace, and lastly - Spotlight - for a bits and pieces like fabric paint in yellow for carapace spots - Serendipitously, I also found some interesting knitting wool from the "Florentine Collection" in Bruno colourings. It was in an odds and ends bin on special.
A bit thicker than I wanted for the sized crab I wanted to make, but if you cut it in the right places you could have a bi-coloured claw
A bit too flexible - but I think I had a solution for that.
I could not resist it - the colours where just right for local crab species - plus it was only a $1.40 for the ball of wool - so why not!
Also bought a crocheting needle for making the 'knee' knots so much easier.
So spent the evening cutting and sorting according to colour of tip and arm sections
I cut it all up and bagged it in groups in zip lock sandwich bags based on colour combos
A large ball of wool but couldn't stop till it was all cut up - caught up on TV shows online while I was doing it!

Then today I started to work on a set of legs for the 10x crab flies I am making
So chose a leg colour combo of dark brown arm and orange tip
Tied 'knee' knots in all of that colour (about 300 pieces), then took 60 of those knotted legs to work on for today

To stiffen up the legs - I used thinned clear silicone
This is made by putting the silicone in a container (a film canister for me) add enough mineral turps and stir thoroughly with something (a skewer for me) until the mixture is the consistency of condense milk or similar fluid. it stays quite separate in the container but keep stirring it will eventual meld into a single fluid.

I rubbed the silicone into material with my finger tips - right into the wool - and then smoothed the material and shaped a right angle into the material - bending at the knot and placed the legs on a stick proof baking tray. Once dry, they will be trimmed to size (they are a lot bigger than the polarfibre legs I was making).

this size issue creates dilemmas on top of dilemmas. Make one change for something not planned for and it ripples down the production line!

Tying these types of flies are so different to the simple coverall candies and clousers I turn out in bulk for local pelagics. But as I have posted previously that 2017 is hoped to be a time to step up the SWOFFING a level - more flats and while some flies will always work - more realistic flies will be needed too.

And while complicated and having multiple steps these crab flies I am tying will be worth it on that first fish that tips onto top of it to take the fly into its mouth. I felt the same when trout fly fishing many years ago - a simple red tag or red spinner or a nymph I used to make out of my orange moustache hair and the orange thigh fur of my ex's favourite cat! I hated more complicated flies due to my fat fingers which would bend the tiny hook as I tied material to them, but I tied them anyway cause it elevated the whole experience.

Stay tuned - more complicated time eating steps to follow  


Thursday, December 29, 2016

First Makings of My Crab Fly

So starting first attempts at claws and legs, getting proportions right
Even testing the floating claws for buoyancy - neutrality
There has been lots of research and reading
And exchanges in Messenger App with other Darwin fly tyers - which has been good - shortens the learning curve
(thanks Sam!)

For the legs I am using some mottled polarfibre others that I am chatting with are using chenille
Had two lengths of fibres in the material box.
The short one would have worked but length made it harder to tie 'knee' knot. The longer fibres were easily trimmed once knot in place
Once tied I placed them on a drawing of my crab to ensure the size was right
Need more thinned silicone on the fibres to hold them together more  - will also give them that stiff leg action if slightly moved across sand/mud to get a fish's attention.
Placed a piece of sticky tape on them to keep the group together for later use - 9 more sets to go!

Next I used some thin black foam and cut a bow tie from it - note proportions to the hook size
This was then tied gurgler style to sides of shank of a small hook.
Then trimmed for claws and sides super glued together. 
Still got to paint one of the claw tips a bright colour - like it is on most natural crabs
9x more sets to go!

I tied a line to the hook and a sinker the other end to ensure it floated despite the hook weight. but not too buoyant as it would effect the sink rate of the fly - so this sort of testing gets that balance right
That's all so far - more to come!
Stay tuned


Saturday, December 24, 2016

First Crab thoughts.....

So there's an awesome thread starting on the Australia Saltwater fly Forum website
http://www.saltwaterflyfishing.com.au/board/threads/permit-crabs.17006/

Focusing on crabs used for permit - but if fussy permit will take them - I am sure other crab eating species will too
Here are two images of crab flies from that forum thread -
So many talented tyers out there to inspire us!

Dont think mine will be of hte calibre above but no harm in trying and testing what ever comes off the tying vice.
So based on the info and inspiration from these learned SWOFFERS and what they have shared - I have started to design my own
Most crabs I have seen up here are predominantly black but there are others in the full range of colours - some tan with orange bits, ones with blue claws, ones with purple or red parts - but I think I will focus on black with bits of colour, for even ten black crabs I make, I will probably make four or so tan ones.

Here is my drawings and scribbles of my thoughts based on the materials I have on hand and a tying sequence of sorts

Here goes. Updates and pics later
Hopefully some captures on the flies in the New Year as well
Some of the local SWOFFERS here in Darwin are focusing on the rumours of permit within reach of day trips in Darwin region - which sounds very interesting and promising
Should be an interesting 2017!

Happy tidings for the festive season everyone.

Thursday, December 15, 2016

Whats next in 2017?..................

So picking up the new (read second hand) aluminium trailer within a week (hopefully as
deposit is paid and now waiting on the sellers new trailer to arrive)

Next job is switch over the jockey wheel with my old trailer (its in better nick)
Then a little wiring but no rush on that with the old light board off old boat/trailer available

Then its a trip to marine mechanic - tune and service the motor, look at the motor ram (the bit that puts motor up and down that currently does nothing)
Finally, install new electric motor, install new sounder/GPS unit
Got to get a 2mp charge for deep cell - told by charging slowly the battery lasts longer (?????)

Have plenty of time over the next few weeks as I start school holidays as of this weekend and a heap of severance pay to pay for it all (starting at new school in new year)
(well wife taking most of last payday at this school for our rural block and building house starts in May)
But the bit of it that I get - should be enough to get boat on the water!

This week, I have also been showing my replacements at my current school how to do the things I do. One of those tasks was how to make a wooden jewellery or nick-nack box. A great project for students with hardly any skills with their hands. When I was at school 30 years ago it was one or two students per class who did not have the skills to make something. With the students I teach today, it is only one or two per class that I can trust with a hammer or tenon saw - very sad!

The advantage of showing this project to the new teacher all the "how to's" of making the boxes - being the boxes I made with them will end up as my fly boxes for on the boat.


Fun to make and so easy to make but vastly variable for many types of needs.
I also spiced mine boxes up with a few pencil drawings on the lids. I do a bit of water colours (not for a while) but never been one to do something from scratch so in this case copied an online design or two off some excellent artists - don't sell them so that might be OK, "oh well" if its not! It's hard to quote and reference the drawing right on the wooden box.


Now the task is to fill them up...............................
But what to tie????

Throughout 2017 I am looking at being more deliberate about my flats fishing - basically more of it!

Over the last seven years that I have been in Darwin, I have been lucky enough to catch a plethora of pelagics - queenfish, macks and trevs but although some trips we only get a couple, on other trips it is almost too easy to catch fifty plus fish under the right conditions. With the occasionally over-sized specimen mixed in to keep me on my toes.

So dedicated time (investigative and lots casting to learn what I don't) for flats species specifically with so many good flats species up here in Darwin and surrounds - milkies, bluebones, bastards, Barra (my nemesis fish), blue salmon, threadies, Jacks and more. Inspiring and most exciting, is being told of (and seen but not caught) the occasional permit at a couple of Spot Xs, also rumours of bonefish on some of the outer islands of Bynoe Harbour and similar type locations like near Dundee, Perons and Vernons (top of Tiwis too) - so must be more fish out there as viable targets - if it is focused on. Heaps of reef type flats too next to deep water.

Most fishermen (fisher-persons) up here - bait danglers, lure tossers, and in part fly fishers - fish for jewfish, golden snapper, and barra (particularly) as their ("be all to end all") primary targets - yet so many more species at different phases of the tide if you change your viewpoint.

Soooooo much to learn, to explore and so many possibilities for such good sight Swoffing - in 2017!

So to fill up the freshly made boxes - it is crab shrimp and such flies to be made (tying blog entries posted as they are designed, made and tested). A few bits of pre-work too, in eyes, claws, bodies, dubbing brushes, and other fly parts can be made before the final fly creations are complete.

Quite exciting really - so much anticipation of what is to come, the tying, let alone the Swoffing!
Yes, many hot days in the sun in skinny water (need a push pole)...........

But who wouldn't want to see a subtle fish cruising through the water oblivious to you (for the moment),
Cast the perfect fly you made yourself to it,
Watch the fish react positively to the fly
(yes, many will be negatively reacting towards the noises I make, the poor approaches made and flies cast on to their heads too!)
But that one reaction,
That one take,
That first response to the hook point sliding home,
That first moment of desperate rush with the zipping line rooster-tailing across the flat

That will make it all worth it! 

Might even get one to the enviro-net for a photo and release

Cant wait for the journey and the ride!
Want to come along!
Lets go!